
Joanna from The Soap Bar asked me if I would be willing to create a cold process soapmaking tutorial to share, and I’m happy to oblige! Thanks to my husband for taking the photos.
Safety first: When making soap from scratch, you need to use lye - it’s not optional. It’s available in the plumbing section at your local hardware store (it’s used to clean drains, I understand.) When mixed with water, lye produces noxious fumes, and if even the tiniest bit gets on your skin, in your eyes, etc., it can cause serious burns. Store it in a safe place, far from children and pets, and always wear safety glasses and gloves when using it. Always add your lye to your water or other liquid, to avoid splashing. Seriously, folks - this stuff is scary. Please be very, very careful, and make sure that your liquids are cool before adding lye - it can cause a volcano if the liquids are hot, and this is extremely dangerous for you and your furniture. It’s a good idea to mix it outside, if that’s possible. Vinegar neutralizes lye, and for that reason, keep a spray bottle of plain white vinegar handy while soapmaking. You will use this to spray your tools during clean-up.
Tools: Before beginning, make sure you have all of your ingredients for your recipe and tools exclusively for soapmaking handy, including safety glasses, gloves, two glass thermometers, two spatulas (silicone works well), containers for your oils and one for your lye mixture, an accurate scale, molds, and a stick blender. Prepare your molds by greasing them in one way or another. I spray a light mist of olive oil on my molds.
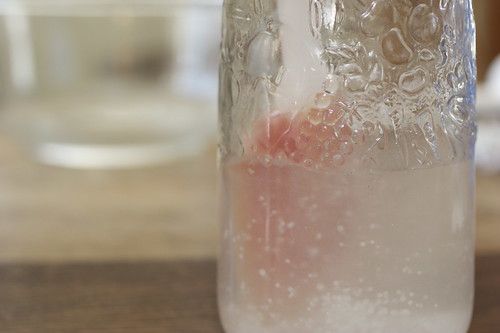
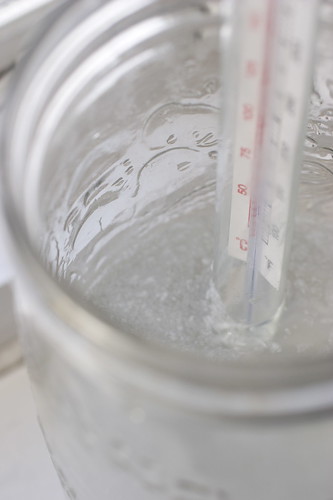
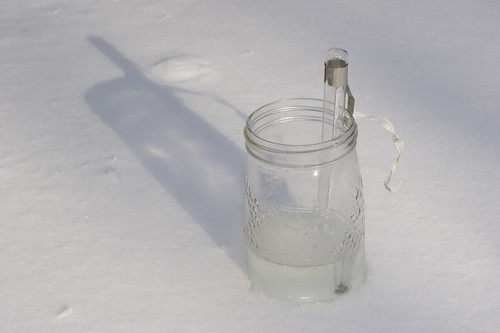
Weigh your lye and water in separate containers. I prefer to use a large glass jar (rather than plastic) for mixing my lye. Slowly add your lye crystals to your water, while stirring gently. The mixture will be cloudy at first, and will get very, very hot. Carefully place a glass thermometer in your lye jar, and set it aside to cool. I happened to have lots of snow outside, so I placed my jar in a pile of snow to lower the temperature quickly (more on that in a second.) Place any lye-tainted tools you’re finished with in an empty sink.
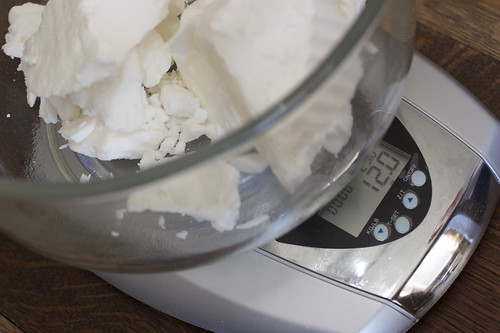
Next, weigh your solid oils. An accurate scale is a must! The solid oils will then need to be melted. This can either be done on the stovetop or in the microwave.
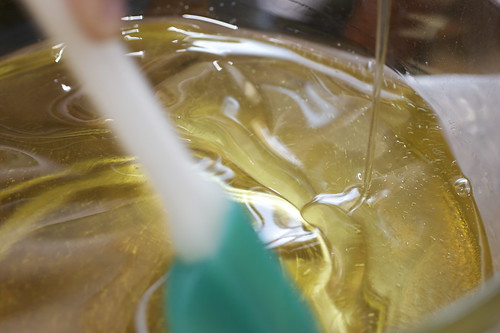
I most often melt my solid oils using the microwave, and add my liquid oils to the melted solid ones afterward, slowly stirring with a spatula. This usually brings the oils down to a good temperature for blending with the lye mixture. (Note: if you’re using beeswax in your soap, the stovetop seems to be most consistent - melt all of your oils (liquid and solid) in there together.)
Check the temperature of your oils and lye mixture. Your recipe should indicate the ideal temperatures for your lye mixture and oils to be when mixed.
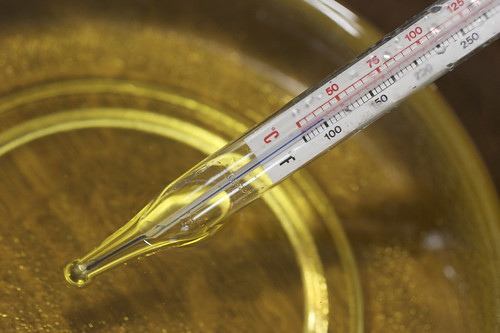
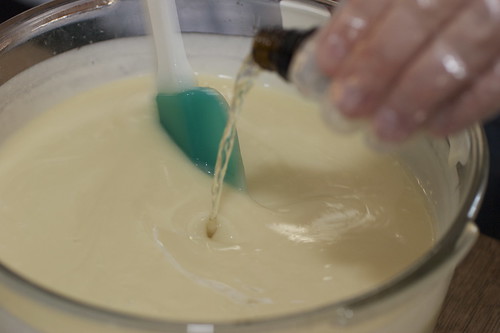
When they have reached that temperature (it’s often around 100 degrees fahrenheit) you will pour your lye mixture slowly (in a drizzle) into your oils, while stick blending. I usually stir with the stick blender (not blending, just using it as a stirring utensil) at first, and blend for a minute here and there as I’m adding the lye.

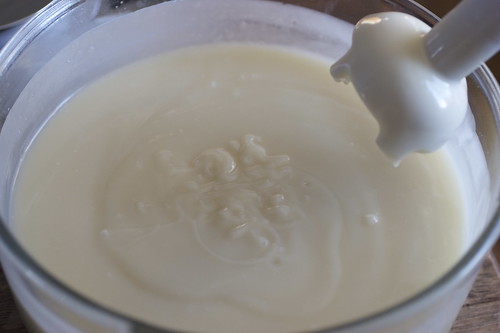
After you’ve added all of the lye mixture, blend until the soap “traces”. When the blender is lifted up, some soap will leave trails on the surface. It should look something like pudding.
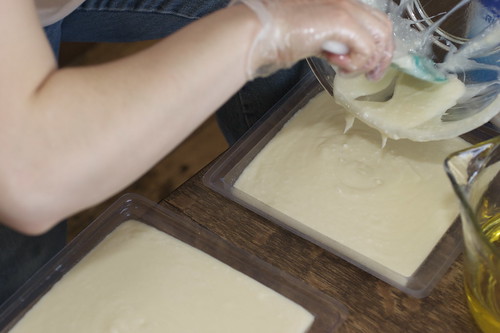
At this point, add any botanicals, essential or fragrance oils, colour, etc., according to your recipe. Stir by hand until incorporated, and pour into prepared molds. Before cleaning up and washing, spray all of your containers and tools with vinegar to neutralize any active lye.
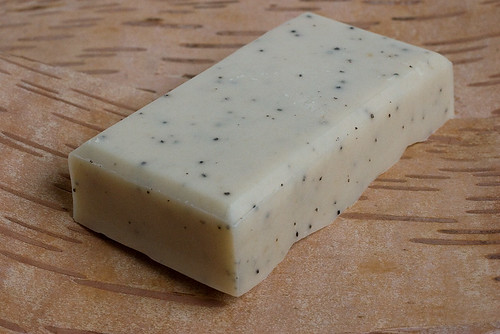
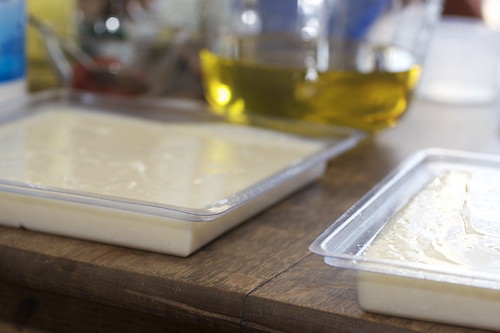
Let the soap set in a warm place for 24-48 hours. Unmold, and cut into bars. If bars need to be trimmed, it is best to wait a couple of days until the soap is a bit firmer. Then, let cure for a couple of weeks for the bars to dry and become firm. This will also make them last longer. Some people suggest insulating the soap as it sets, but with these molds, I don’t find it necessary. Happy soaping!
6 comments:
Thanks, Sherrie, for the tutorial, and Adam for the great photos to go with it! A lot CP soap-making books don't have great photos to go with their directions.
And thanks for getting Sherrie to do this, Joanna!
Great photos-great tutorial!
Wonderful tutorial, which I would have seen it before I started soaping, then I could have truly understood trace.
Best tutorial I've found online yet! Great pictures and great tips. Thank you!!!
how do you make it wavy on top??? it's so pretty!
Great job on the tutorial!
Post a Comment